Web is one of the most important communication media today and as many other it use graphic. But not much of webmaster take attention on the preparation of the graphic for web. Other problem which appear is great number of “harvesters” who just take all of this images for their own purpose and then publish it with no permission. To thing become worse one company from UK had released last year plug-in which allow to convert web image into the printing quality image… the age of piracy is here.
What we can do- at least to make a big problem with any who would like to take our graphic. Other benefit that with the same physical size in pixels our image will be much smaller in KB and with no significant loose in appearance make our site work much smooth and faster. In the beginning of this site my images was from 90KB up to 150 and today with the same size in pixels they are much smaller and never go over 40 KB. And where is the trick? No trick- Photoshop CS2
First you have to do is to open image in CS2 and make basic adjustment for the web. Experience show that there is no need to place image wider then 800 pixels and for me best fit is 640 pixels. If you really want to put “harvester” on problem then reduce it on 300 pixels. Then you do following think- hold Shift-Ctrl-Alt and then press S. You will have then open new window for the settings of your image for web.
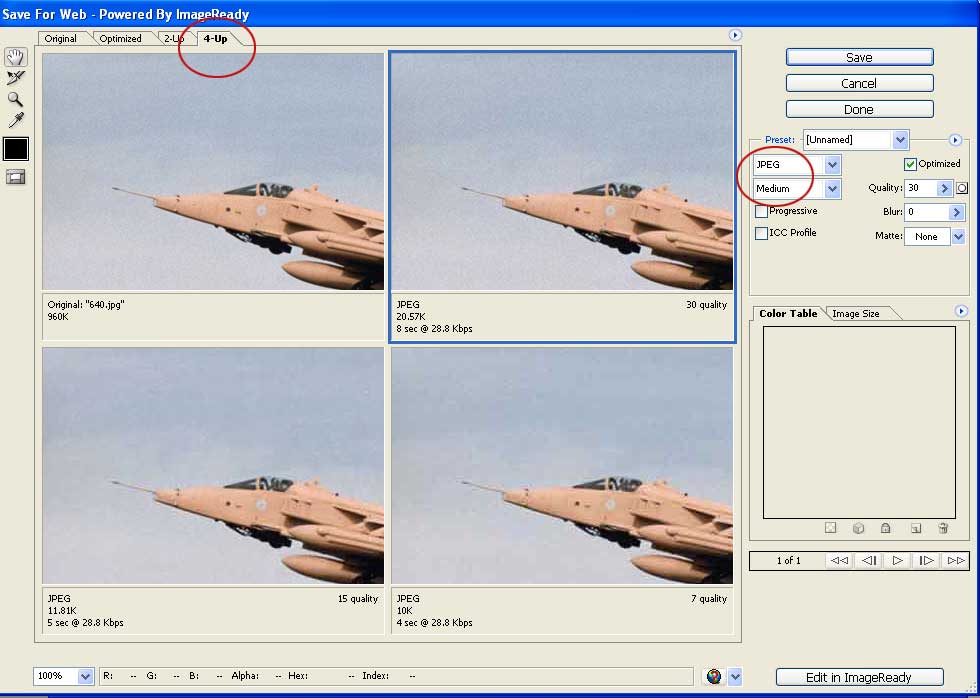
First you have to do is to press on tab on the upper line and recommended is 4 Up. This will split your image in four small windows and each will show you your image in different size and how it look like. Note that one image, right upper corner, is blue outlined. This image I have press as option for save on web. Under the image you see size and format- it is JPEG and 20.57KB and this is reduction from standard reduced image which had 52.8KB before.
On the starboard side you will see control panel. Watch at the red indicated tabs. First is set on JPEG and this is best for format for color profiles and images. Almost 100% of my graphic is set on this format. Under this is the Level of the compression and I choose Medium. There is also option Low but I don’t use it as well it distort image more then I like to be.
Then you press button Save and then new window will open and this will allow you to choose where you to save this image. Better save it in separate folder then the original but if you choose the same folder then original will be overwritten [not if you change name ]. When you save this you can close your image. Now panel will appear which will ask you if you want to save changes on the image. Choose No and close file.
Hope that this will be of great help to you…